2 Rich 2 Thin

  • Home
  • All Posts
  • Essays
  • Recipes
  • Try This
  • Book Reviews
  • Ask Abby

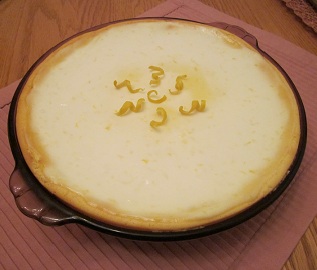
Lemon Cheese Cake

January 15, 2012 by Abby Lange 2 Comments

Okay, so WHY am I posting a recipe for an incredibly high-fat, high-calorie dessert?  Because I can.  And because one of the 2Rich2Thin philosophies is that you can have anything as long as you plan for it and exercise a little moderation.  Make this amazing dessert and share it with a group of friends.  That way you get to have it, and the leftovers aren’t sitting in the frig calling your name.

My husband says he could kill himself eating this sinful dessert.

Recipe: Lemon Cheesecake

Summary: Unbelievably Delicious Dessert

Ingredients

  • 1 1/2 c. vanilla wafer crumbs
  • 1/2 c. ground almonds
  • 6T melted butter
  • 8 oz regular cream cheese
  • 8 oz mascarpone cheese
  • 3/4 c. sugar
  • 2 eggs
  • 6T lemon juice
  • 1T lemon zest
  • 1 c. sour cream
  • 1T sugar
  • 1T lemon zest

Instructions

Crust:

  1. Blend 1 1/2 c. vanilla wafer crumbs with 1/2 c. ground almonds in your food processor. (The almonds add some protein and some heart-healthy fat, as well as a wonderful nutty crunch.)
  2. Pour into a 9″ pie plate or springform pan.
  3. Add 6T melted butter and mix well.
  4. Press crumb mixture into bottom of springform or bottom and sides of pie pan.

Fillling:

  1. Mix 8 oz regular cream cheese, 8 oz mascarpone cheese and 3/4 c. sugar together.
  2. Beat in 2 eggs until creamy.
  3. Gently stir in 6T lemon juice and 1T lemon zest.
  4. Pour over crust and bake at 325° for 45 minutes
  5. Remove from oven and allow to cool while you mix up the topping; the filling should fall a little bit to make room.

Topping:

  1. Beat 1 c. sour cream, 1T sugar and 1T lemon zest
  2. pour over baked cheesecake
  3. Bake an additional 10 minutes at 325°
  4. Remove from oven and chill – This is best if it has 4-5 hours to chill, so make it in the morning to serve as an after-dinner dessert.

Preparation time:

Cooking time:

Number of servings (yield): 8

My rating 5 stars:  ????? 1 review(s)

Copyright © 2Rich2Thin.com.
Recipe by Abby Lange.

Filed Under: Recipes

Almond Cheesecake Cookies

December 25, 2011 by Abby Lange Leave a Comment

 Almond Cheesecake CookiesI spent some time researching recipes for a shortbread-style cookie made with cream cheese, and they all had so much sugar that I nearly went into a diabetic coma just reading the recipe.  For some reason, people seem to feel that the natural tangy-ness of cream cheese calls for an incredible addition of sugar (I find the same is true for a lot of cheesecake recipes).  Since I think of shortbread as a lower-sugar cookie, and I have a husband who constantly complains that things are too sweet, I decided to come up with my own recipe.

For a comparison, most recipes that call for this amount of flour, butter, and cream cheese call for 2 full cups of sugar.  Ugh.  I want to taste the cream cheese.  I also find that vanilla, and to a lesser degree almond extract, already tastes sweet to me, so I don’t want to swamp the flavor with all that sugar.  I find that I can cut the amount of sugar called for in most desserts without any ill effect to the final product, and that means I can eat more cookies.

Ingredients

  • 1 c. (2 sticks) butter
  • 6 oz. cream cheese
  • 1 1/3 c. sugar
  • 2 c. all-purpose flour
  • 2/3 c. ground almonds
  • 1 t. vanilla
  • 1/2 t. almond extract (this can be reduced or omitted if you don’t care for it)

Instructions

  1. Cream butter, cream cheese and sugar.
  2. Blend in flour and flavorings.
  3. Fold in nuts.
  4. Chill dough 1/2 hour.
  5. Portion dough into roughly 1″ balls.
  6. Place balls on cookie sheet and flatten (the cookies will not spread, so they can be placed close together).
  7. Decorate with sprinkles or colored sugar.
  8. Bake at 375° for 12-13 minutes.

You can flatten the cookies with your fingertips or a fork, but that will leave impressions in the cookie (you might not mind that).  You can also use the bottom of a glass (cover it with plastic wrap so the dough doesn’t stick).  I use a heavy stainless-steel meat tenderizer, which I don’t think I have ever used to tenderize meat, but it’s great for making flat cookies.

You can substitute any kind of nut, but anything besides almonds, or maybe macadamia nuts, will be visible in the cookie.  Hmm, I bet using macadamia nuts and changing the almond extract for coconut extract would be a winner.  If you try it before I do, let me know how it turns out.  Enjoy!

Filed Under: Recipes

Peanut Butter Chews

December 21, 2011 by Abby Lange 1 Comment

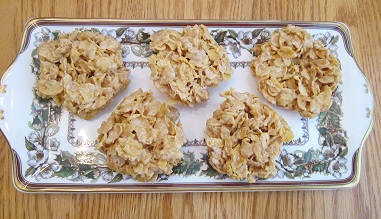
Peanut Butter treatsThese sweet peanut butter treats are a favorite from my school days.  I’m pretty sure the number of kids eating in the cafeteria doubled on days when they had Peanut Butter Chews for dessert.  They’re made much the same way Rice Krispies Treats are made, so they have the same cohesive qualities from the marshmallows.  The cafeteria served three cookies on a small plate, and we girls ate them delicately.  The boys, who could not be bothered to sit a moment longer than necessary and who would rather die than do anything delicately, would mush all three chews together to form something roughly softball size and exit the cafeteria munching happily on it.

Ingredients

  • 1 10-oz. bag marshmallows
  • 3-4 T butter
  • 1/3 c. peanut butter
  • 8 c. Frosted Flakes

Instructions

  1. Place marshmallows, butter, and peanut butter in a large microwave bowl.
  2. Microwave on high for 2 minutes or until marshmallows are large, bloated, and scary-looking.
  3. Stir until blended.
  4. Fold in Frosted Flakes until all flakes are coated with candy.
  5. Drop by 1/4 c. scoops onto wax paper OR press into a buttered 9″ x 13″ pan.
  6. Cool until set.
  7. Cut into bars (if you used the pan) and store in a sealed tin.

You can use the “low sugar” version of Frosted Flakes, but I don’t recommend using regular corn flakes.  The sugar coating totally changes the texture, and the regular corn flakes just don’t stand up well to the marshmallow candy.  The result will still taste good, but it won’t be pretty.

Yes, if you must, you can use margarine instead of butter, but why would you?  It’s a cookie.  As cookies go, these are fairly low in fat, and between the cereal and the peanut butter, there is some actual food value.  I would be lying if I said that I have not had Peanut Butter Chews for breakfast on more than one occasion.  Enjoy!

Filed Under: Recipes

Sand Tarts – Russian Tea Cakes – Mexican Wedding Cookies

December 17, 2011 by Abby Lange Leave a Comment

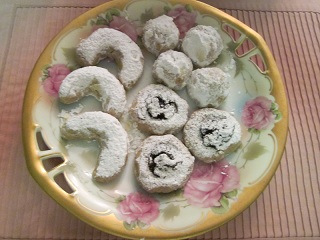
A plate full of cookiesAs you can tell from the title line, these cookies, with very few variations, are a favorite in almost every culture.  It seems like no matter what I call them, someone has to “correct” me, and usually tell me that their grandmother had the One True Recipe and I don’t make them properly.  Well, tough.  This is MY grandmother’s recipe, which you are free not to eat.  And don’t think you won’t get caught sneaking one, because unless you have the reflexes of a kung fu master, you’re going to be wearing enough powdered sugar to give you away.

The authentic basic recipe is fat (usually butter or lard, but sometimes oil), flour, powdered sugar, ground nuts (whatever is indigenous to your ancestral lands– almonds, pecans, pistachios, etc.), and flavorings (most often vanilla, cinnamon, citrus, cardamom or anise).  The cookies are shaped (into balls, crescents, or “thumbprint” cups filled with more nuts or jam) and baked, then dredged in more powdered sugar.  Just in case you didn’t inherit a recipe from your grandmother, here’s one from mine.

Ingredients

  • 1 pound (4 sticks) butter
  • 1/2 c. powdered sugar
  • 4 c. all-purpose flour
  • 2 T water
  • 2 t vanilla
  • 2 c. finely chopped nuts (I use pecans)
  • more powdered sugar for dredging

Instructions

  1. Cream butter and 1/2 c. sugar together.
  2. Slowly incorporate flour until a stiff dough forms.
  3. Fold in water, vanilla, and nuts.
  4. Shape dough as desired and fill if desired (filled cookies shown above with about 1 t prepared mincemeat).
  5. Place on baking sheets. You don’t need to leave much space between cookies, because they won’t spread as they bake. You don’t need to grease the baking sheet, either, because there is so much butter in these cookies.
  6. Bake at 325° for 15 minutes; cookies should be dry-looking but not brown (except on the bottom).
  7. Cool on sheets 2-3 minutes, then roll in powdered sugar or dredge from a sieve. The cookies should still be warm, or the sugar won’t stick. Handle them carefully, as they will shatter if you squeeze them.
  8. Cool completely (I drain and cool on brown paper grocery bags) and place in tight-sealing tins with waxed paper between layers.

This recipe makes about 5 dozen cookies depending on size and shape.  My grandmother liked crescents; I prefer the balls (if I make them bite-sized I have a fighting chance of getting the whole thing in my mouth without adorning myself in powdered sugar) and the mincemeat filled.

In surfing around the net, I find that my Grammy’s recipe has about half the amount of sugar in the dough as many recipes I see posted.  That’s probably why these are my husband’s favorite; he claims he doesn’t like really sweet things (unless it’s these cookies, or lemon cheesecake, or Häagen-Dazs, or…).  Considering that you’re going to roll or dredge them in powdered sugar after they’re baked, I’ve never missed the sugar in the dough.  I figure every gram of sugar you can leave out is a plus, considering how much you’ll be getting on the outside of the cookie.

 Try some of the variations; you may find one you really like. Claim it came from your grandmother– I won’t tell.

Filed Under: Recipes

Guilt-Free Asian Salad Dressing

December 7, 2011 by Abby Lange Leave a Comment

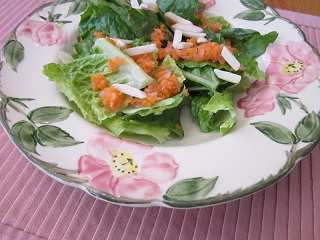
Guilt-Free Asian Salad DressingThanks to my husband’s Air Force career, we have lived all over.  I was sadder to leave some places than others, but in most spots there was a treasure I wished I could pack up and take with me.  I guess it says something about my priorities that those treasures were usually restaurants.

In Columbia, South Carolina, we enjoyed many a meal at a Japanese restaurant called Micato.  (Since my husband refuses to eat sushi, it was a fine thing that Micato makes delicious curry dishes as well.)  They had the most amazing and flavorful dressing on their salads, and after a little serious taste-testing (that’s my story, and I’m stickin’ to it) and some experimentation, I figured out how simple and how incredibly low-calorie it was.  It also makes a yummy topping on fish.

In your food processor, put 1 ounce of gari (asian pickled ginger root, the thin-sliced pink stuff) and 1-2 ounces of carrots.  Process, and while the machine is running, drizzle in 1 tablespoon of light-style (no added sugar) rice vinegar until the dressing comes together.  (Micato’s dressing is actually just gari and carrot, but I find the addition of the vinegar spreads the flavor through a tossed salad better.)

The whole batch has about 25 calories (6 grams of carbs, no fat), and it’s enough to dress three to four small salads.  The salad shown here has about a tablespoon of the dressing and a tablespoon of slivered almonds on romaine lettuce; the whole salad is about 25 calories and less than 5 grams of carbs, and it’s delicious (and pretty).

If you want to add even more zing, process in a few slivers of jalapeño or serrano chilies, for another jolt of flavor in return for barely a trace of carbs and calories.  If you want the dressing sweeter and you can handle a few more carbs and calories, add a tablespoon of mirin (japanese rice wine).  It’s a delicious addition, but a tablespoon will cost you 35 calories and 7 grams of carbs, still not bad split between three or four salads.  Enjoy!

Filed Under: Recipes

Low Carb Canapés

November 30, 2011 by Abby Lange 2 Comments

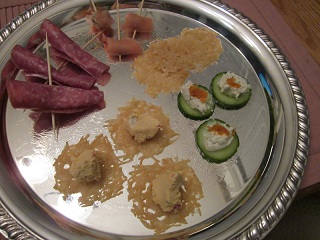
low carb party snacksWe’re coming into the heavy-duty party season, and finger-foods abound.  But what can you do for your guests who can have dip, but no chips?  It’s nice to have something to offer them besides cheese cubes.  (And if you’re the one on low carbs, consider taking a platter of low carb treats to the party yourself.  I’m a big believer in making and sharing the goodies.)

There are plenty of things you can buy ready-made.  Check the appetizer section of your favorite restaurants’ menus for treats you can copy or pay them to make for you.  I have a Mexican place right across the street that does a bacon-wrapped grilled shrimp with queso blanco and a sliver of jalapeño in the center.  I could make them myself, but it’s my contribution to the economy to pay them to make them.  That’s my story and I’m stickin’ to it.

If you don’t have low-carb options available for easy purchase, here are a few ideas for stocking the snack tray.

Choose Your Cheese

Not all cheese is created equal when it comes to carbs, so choose wisely when you look to lay out a cheese board.  Gruyere, the real-stuff ancestor of Swiss, is a low-carb champ at roughly .1 gram of carbs per ounce.  Compare that to Swiss at 1.5 grams per ounce, and you can see that picking the wrong cheese can blow your carb limit in a heartbeat.  Close behind Gruyere are the French soft cheeses Brie and Camembert at just over .1 gram per ounce.  Cream cheese has six times the carbs of Brie, so any soft-cheese-filled goodies should have a little French flair.  If you live in the middle of nowhere and only have access to common commercial cheeses (I’m sorry), go with Monterey Jack at .2 gm/oz or sharp cheddar at .3 gm/oz.  Mild or Colby Cheddar has twice the carbs, and American has two full grams of carbs per ounce.

If you can stand a few more carbs, fillings of cream cheese can be flavored with a variety of yummy things, or you can take the lazy way out and use a prepared cheese spread like Boursin.  The Garlic & Herbs is our favorite, but if you can find the Apple-Cranberry at holiday time, it is not to be missed.

Choose Your Vehicle

Since most crackers and chips are just too carb-intensive for a low-carb diet, the trick to interesting canapés is to find a vehicle, a base, to get delicious cheese, meat, and other low-carb treats to your mouth.  My husbands favorite is hard salami rolled up with a soft cheese filling inside and secured with a skewer.  Any cold cut or sliced meat that is firm enough to hold its shape makes a great wrapper.

For crunch and color, I like to use thin slices of cucumber loaded with dip and garnished with caviar, salmon roe, or, if you have fish weanies like I do, some grated carrot.  For an Asian flair, make sashimi-gari rolls.  Sashimi is raw fish (sushi is the raw fish over a foundation of rice, which is a low-carb no-no); gari is pickled ginger root, those thin pink slices usually served with sushi.  Again, for those too squeamish for raw fish, you can wrap chunks of a firm steamed fish or fake crab (and fake crab is basically firm steamed fish with some added color and crab flavoring) in the gari.  Gari does have carbs, but the individual slices are so thin, each bite is negligible.  A 3-ounce container of gari, about 16 grams of carbs, will make a large tray of appetizers.  Just don’t eat the whole thing.

If you’re lucky enough to find nice, large walnut halves, they can be a great dip vehicle as well.  Each half has about 1/4 gm/oz of carbs, so don’t go wild, but a walnut half with some of the Apple-Cranberry Boursin is totally worth it.

The undisputed king of cracker substitutes, though, is the parmesan wafer.  On a baking sheet covered with a silicone sheet like Silpat or good-quality parchment paper, place small stacks of grated parmesan (be sure to leave room between stacks for a little spread).  The wafers shown above were made with about a tablespoon of coarsely grated parmesan each.  The coarser the grate, the more lacy the look of the baked wafer; a fine grate will make a more solid wafer.  Flatten each stack slightly with your hand, and bake them at 350° until they are the color you want.  Golden brown takes about 10 minutes (if your oven runs hot, start at five minutes and check every minute until you get the color you want); that’s what I like for canapés, because it’s still a little chewy and it doesn’t shatter when you bite into it.  Fine grated parmesan will bake faster, so start checking at the 5 minute point.  You can also shape the wafers if you want; take them hot off the baking tray and drape them over a wooden spoon for little taco shells, or push them gently into a mini muffin tin to make cups. 

You can also bake them 14-15 minutes to a mahogany color, salt them, and eat them like potato chips.  Toss some chili powder and cayenne into the cheese before baking, and you’ll get the closest thing to a carb-free Dorito that you’re going to find.  They will be much more brittle than the golden brown wafers, but they should hold up to some salsa or hot queso.

Enjoy the party, and be prepared to defend the low-carb goodies from everybody else!

Filed Under: Recipes

Pumpkin Cheesecake

November 29, 2011 by Abby Lange Leave a Comment

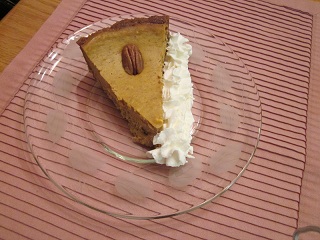
Here I go again with the fattening desserts.  I love dessert.  And I think the richer you make a dessert, the more likely it is that you’ll be satisfied with a reasonable-sized portion.  If you’ve tried my recipe for Lemon Cheesecake, this recipe will look very familiar, as the method is similar.  I find regular pumpkin pie a little cloyingly dense and sweet; this cheesecake variation is much nicer in both departments.  As with any high-fat dessert, make this when you’ll be hosting family or friends so you don’t eat the whole thing by yourself.

Crust:  Blend 1 3/4 c. gingersnap crumbs with 1/2 c. ground pecans in your food processor.  (The nuts add some protein and some heart-healthy fat, as well as a wonderful crunch.)  I like Anna’s Ginger Thins or Mother’s Iced Oatmeal Cookies for the crumbs.  Pour into a 9″ pie plate or springform pan.  Add 3-6 T melted butter and mix well.  (A raised cookie like the Iced Oatmeal will absorb a lot more fat than a pogen-style cookie like Anna’s, so correct your butter accordingly.  You want the result moist enough to hang together, but not oily-looking.  It’s easier to add more melted butter than more cookie crumbs, so start at the low end of the butter measure and work up as needed.)  Press the crumb mixture into the bottom of the springform or the bottom and sides of the pie pan.

Fillling:  Cream 4 oz regular cream cheese, 8 oz mascarpone cheese and 3/4 c. sugar together.  Beat in 2 eggs and one 16-oz can of solid pack pumpkin until creamy.  Fold in the spices: 1 1/4 t. ground cinnamon, 1/2 t. ground ginger, 1/4 t. ground nutmeg, 1/4 t. ground cloves, and 1/2 t. salt.  If you want some extra zing, you can add 1T fresh lemon zest.  Pour over crust and bake at 325° for 45 minutes.

At this point, the surface is somewhat set, and you can garnish with pecan halves without fear that they will sink into the filling.  I like to put pecans on top in case one of my guests has a tree-nut allergy I don’t know about.  Since most people don’t expect nuts in their pumpkin pie, it’s nice to alert them that there is a hidden ingredient in the crust.  Plus, it’s pretty.  Bake an additional 20 minutes at 325° or until the filling looks completely set.  If you jiggle the pan a little, the whole pie should jiggle as a unit.  If there seems to be a much softer puddle in the center of the pie, leave it in the oven for another 5-10 minutes, but be sure to set a timer, because it will go from done to overdone in nothing flat.  The firmer you bake the pie, the more likely it is to crack during the cooling process, so err on the side of underdone.

Remove from oven, cool, and chill.  Don’t try to cool it too quickly, or it will fracture on you like the San Andreas fault, and you won’t have a pretty pie (if this happens, just slice it in the kitchen and bring out individual slices– your guests will never know).  This is best if it has 4-5 hours to chill, so make it in the morning to serve as an after-dinner dessert, or make it the day before.  Of course, there should be whipped cream (what’s pumpkin pie without whipped cream?), but I like to serve it on the side of the pie slice rather than on top so my guests can choose to indulge or not.  Enjoy!

Filed Under: Recipes

Stuffing Omelette

November 28, 2011 by Abby Lange Leave a Comment

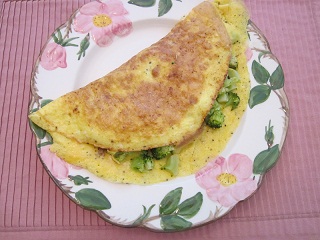
Another favorite alternate use for Thanksgiving leftovers, the Stuffing Omelette is a great brunch dish for the guests who stayed overnight after Turkey Day, or a fortifying lunch  for hardy shoppers returned from their Black Friday early-morning adventures.  (Personally, I think Black Friday is nuts.  I will be inspecting the insides of my eyelids at 6:00 am the day after Thanksgiving.  If you’re going to brave the crowds, be sure to read Spend More to Spend Less before you go, and don’t give in to the bargain hysteria!)

Whether this recipe works for you will depend on what your traditional stuffing recipe looks like.  (And if you’re a cheater, I’m not sure I’d try this with Stove Top unless you do a lot of doctoring to it.)  My traditional family stuffing recipe is mostly white bread and a few stray gizzards, and my husband begged from the earliest days of our marriage not to have that dish at our table.  It wasn’t much of a sacrifice to agree with him, as I am not a fan of organ meats.  Four years living in England could not convince me that it is a good idea to eat parts whose sole intended function is to cleanse waste from the body.  You know that bag of suspicious parts that comes packed inside your turkey?  In our house we call that garbage.  I mean, come on, not even the cat wants to eat it.

My “new traditional” stuffing has bread crumbs and homemade corn bread, but it’s also got sausage (I love the Jimmy Dean Sage Sausage), diced onions and celery, shredded carrot, and diced apple, so there’s plenty of stuff that makes sense inside an omelette.  Sadly, most of the green cooks away, so if I happen to have some leftover asparagus or broccoli, I’ll toss that into the omelette as well, for color.

A plate-sized omelette as pictured above is made with three eggs.  Add a little salt and any other spices you like while you’re beating the eggs, along with a tablespoon or so of water.  Using milk or cream at this stage actually weighs down the egg– you’ll get much better volume on your omelettes with water.  Cook in a hot pan (the calories you saved by not adding milk or cream to the eggs can be allocated to the butter in the pan).  Just before the omelette is ready to fold, put about 1/2 cup of stuffing and 1/4 cup green veggies on top.  I recommend you microwave the stuffing and veggies before adding them to the pan to get them nice and hot; stuffing tends to be pretty dense, so if it is well-chilled from the refrigerator, it won’t have a chance to heat through in the short time it will be in the omelette pan.  You don’t want your guests cutting into their steamy omelette and hitting a lump of cold stuffing in the middle.

For a really decadent spread, make Leftover Latkes, the sweet potato variation, with a side of fresh fruit and a bubbly pitcher of mimosas.  Then sit back, relax, and decide you’ll go shopping later.  Much later.


Filed Under: Recipes

Leftover Latkes

November 28, 2011 by Abby Lange Leave a Comment

So, now you’re frowning at leftovers, wondering how to use them up without endless repeats of the basic Thanksgiving menu.  You’ve also got odd amounts of certain items, depending on their popularity at the main feast.  I always seem to end up with slightly less than enough mashed potatoes for the last presentation, unless I find a way to extend them.  Here’s my favorite.

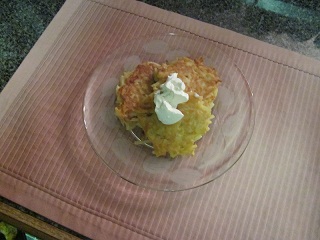
I can’t remember when I made my first latke, or potato pancake; growing up in a Catholic household, it wasn’t a cultural food for us.  But at some point I ate one and decided that it was pure genius (and pure deliciousness), and I determined to add it to my cooking repertoire.  Peeling and grating potatoes, though, is frankly a drag.  So one day I decided to make latkes out of leftover mashed potatoes, and it worked like a charm.  It has the secondary advantage of portion control– instead of plopping an indeterminate amount of loose mashed potatoes on your plate, you now have individual pancake portions to keep you honest.  And a little sour cream on top is probably still fewer calories than the lagoon of butter or gravy you normally create in a mound of mashed potatoes.

The basic latke recipe is typically:

1 cup grated potatoes
1 T grated or diced onion
1 beaten egg
1 T all-purpose flour
1/2 t.  salt

You stir this together into a loose “batter” and plop by generous spoonsful into a hot frying pan (prepared with your favorite fat, or nonstick spray if you must).  It takes quite awhile to cook, because the potatoes are raw (if you’ve ever cooked hash browns, you’ll have an idea).  I sometimes make this classic style, thanks to the nice folks at Simply Potatoes who do the peeling and shredding for me.

Working from mashed potatoes is a much quicker job, because your potatoes are already cooked.  And yes, if you cheated and bought your mashed potatoes from Simply Potatoes or Bob Evans, their product will work just fine for this recipe.  You probably already added salt to your mashed potatoes, so you don’t need that.  Whether you want onions is a personal choice.  Start with one cup of your mashed potatoes, and add one beaten egg and 1 T flour.  If you added a lot of milk, cream, or butter when you mashed the potatoes, this may result in a gooey mess, and you’ll have to add more flour to compensate for the added liquid.  Don’t add more than 3 T in total, and if you need to add that much flour, I recommend adding a 1/2 t. of baking powder to lighten up the batter. 

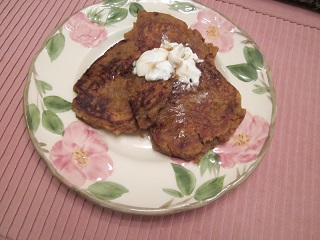
Now cook it like a regular pancake, just 1-2 minutes per side until golden brown.  Serve hot with a dollop of sour cream.  This method will also work for mashed sweet potatoes; in additional to the sour cream, drizzle a little maple syrup over the top when serving.  You may find you like these so much that they’ll go on the regular menu instead of the leftover menu!

Filed Under: Recipes

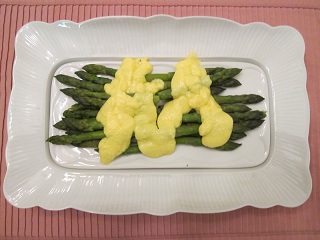
Easy Microwave Hollandaise

October 25, 2011 by Abby Lange 1 Comment

Yes, Hollandaise is incredibly high in fat.  It’s also delicious, and unlike a lot of sauces and gravies, it has no carbs.  Zero.  Zip.  Nada.  Okay, there is a trace of carb in the egg yolk, so if you consume the entire batch, you might get around a gram of carbohydrate.  But if you’re trying the low carb lifestyle, now is definitely the time to learn to make this decadent traditional French sauce.

I love to cook, but I hate to wash dishes, so the thought of a double boiler makes me cringe.  But it turns out that almost anything that requires a double boiler can be done in a microwave oven– the key is short bursts of time.  The only cooking equipment you need for this recipe is a measuring cup and a wire whisk.  Oh, and a strainer for the lemon juice.  The bottled stuff is fine for your water bottle or iced tea, but for this sauce, you’re going to want lemon juice on the hoof, so to speak.  The flavor difference is huge.

1/4 c (1/2 stick) butter
1 T fresh-squeezed lemon juice
2 T  water
2 egg yolks
1/2 t  salt  (if you use unsalted butter you may need more, but you an always add that later)

Melt the butter in your microwave.  Whisk in the lemon juice and water.  Test the temperature (sticking your finger in it is fine– I’ll never tell) and make sure it is cool enough not to cook the egg yolks on contact.  Whisk in the egg yolks and salt.  Microwave for 20-30 seconds.  Remove (yes, it’s scary-looking) and whisk.  Return to the microwave and zap for another 20-30 seconds.  Depending on the wattage of your microwave, you made need a third round of zap-and-whisk, but you should end up with a smooth, lovely, pale yellow sauce that is basically a convenient vehicle for conveying butter and lemon to your mouth. 

Use it on any protein or vegetable; my husband would eat an old shoe if I put enough Hollandaise on it.  This makes a small batch, but it does not keep— the egg yolk works well as a thickener, but not as a long-term emulsifier, so the butter and liquid will start to disagree with one another as the sauce cools.  You can warm it again for a few seconds and re-whisk, but it will eventually overcook.

Use your leftover egg whites in omelettes or souffles (another high-fat low-carb treat), or angel-food cake if you are allowing yourself enough carbs.

Filed Under: Recipes

  • 1
  • 2
  • Next Page »
Follow Us on Google+on
Follow Us on Twitteron

Recent Posts

  • Lemon Cheese Cake
  • Lierre Keith Explodes “The Vegetarian Myth”
  • Almond Cheesecake Cookies
  • Peanut Butter Chews
  • Sand Tarts – Russian Tea Cakes – Mexican Wedding Cookies

Copyright © 2025 · eleven40 Pro Theme on Genesis Framework · WordPress · Log in